how to use your macbook like a boss
September 5 2015
I first started using a Macbook in 2008 when I was heading off to college. At the time, one of the unfamiliarities of Mac OS X was its window layout and management. In Microsoft Windows, application windows could easily be toggled to full screen with the “maximize” button, which hung out right next to “minimize” and “close”. Made sense. When I started using Mac OS X, I was presented with three small, colorful circles at the top of each application window. On top of this, they were on the wrong side!
Somehow moving past this, I decided to test it out. I clicked the red button… the window closed. After reopening, I tried the yellow one… the window minimized. Wow, Apple was really nailing it. At this point, I knew I could totally learn how to use a Mac. I just needed to maximize Finder so I could quickly reorganize some files and… wait a minute, the green button didn’t maximize it. Sure, the window got bigger. But not full screen-bigger. Just different-bigger. For another application, it made it a different different-bigger. I paid 1300 bucks for this shit?
Then, after I realized that yes, I had indeed paid $1300 for it, I decided I would immediately accept this flaw oddity and continue deluding myself into liking Mac OS X. After only a couple months, I was completely brainwashed and have since been a proud owner of eight Apple products. What a ride.
There’s a tool for that
Nonetheless, brainwashed or not, Macbook power-user or just casual-user, you may still get frustrated from time to time when trying to resize application windows. Luckily, there’s a solution; let me show you a few tips and tricks that have worked great for me.
Put on some spectacle(s)
The cool thing about using computers is that they can be customized to your needs. If there is a lack of functionality that you need or want, there’s a good chance that somebody, somewhere created a tool to fill this gap. This somebody is most likely a computer programmer, too lazy to resize his own windows, but more than willing to code an entire application that does it automatically. In many ways, programmers can be lazy as shit. But they have no problem going the extra mile if it will help them automate a task (read: achieve more laziness).
Thanks to many a lazy programmer, there are a plethora of window resizing tools out there. I’ve used a few, including BetterSnapTool and SizeUp. Both got the job done just fine. I’ve also heard great things about Divvy, which shows you a grid of your screen and allows you to use your mouse to resize and relocate your windows. To me, however, this visual representation of your screen is overkill and unnecessary. My tool of choice is Spectacle. It’s free, open-source and awesome. Let’s see how to set it up.
First, head over to Spectacle’s website. Clicking the large “Download Spectacle” button will download a .zip file to your computer. Unzip this folder (by double-clicking it and opening it). You should now see a file called Spectacle.app in the same folder where the .zip was downloaded. This is the Spectacle app! To make sure it stays around, click and drag Spectacle.app into your Applications folder.
Now head into the Applications folder and double-click Spectacle.app to open it and start using it! You can find out more information about the app in the README of the open-source project. Here are the basics:
Get acquainted
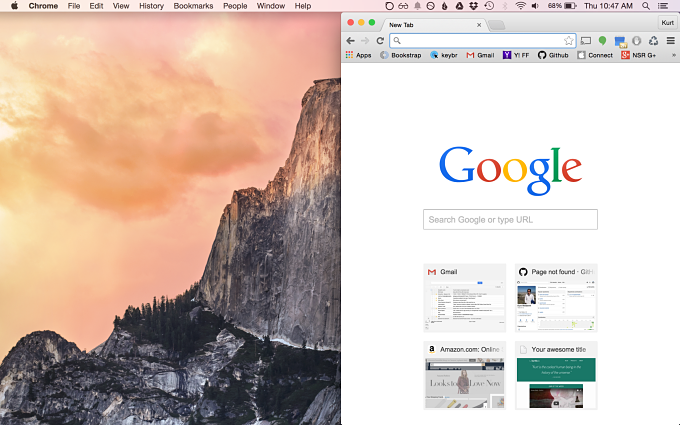
Check the top of your screen right now. You should have a menu bar with some icons on the right hand side, such as the time and date, wifi status and volume controls, among others. Might look a little bit like this:

After opening Spectacle, you should now see a pair of spectacles chilling alongside the other icons. Click these spectacles, and you should see a menu like this:
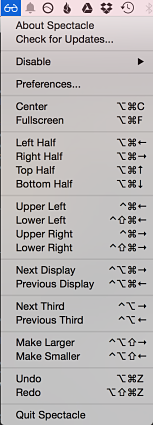
This menu has a list of all the positions to which you can send a window. This should be pretty self explanatory. By clicking on one of these, you will send the current application window you’re looking at to that location. So, maybe you want your browser to be on the right half of the screen. Make sure your browser is open and you’re looking at it. Then click the spectacle icon in your status menu bar, and click Right Half. Boom!
Any preferences?
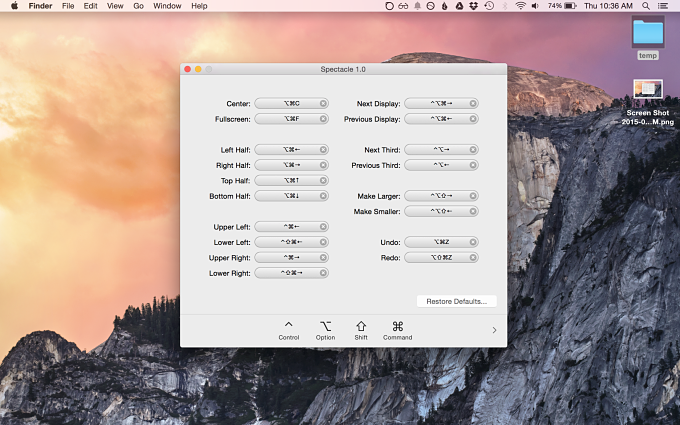
Before I show you the true power of Spectacle, let’s make sure the settings are, well… set. Click the spectacle icon in your status menu bar, and click on Preferences. This will open up Spectacle’s preferences. Most of these options are aimed at customizing the keyboard shortcuts for all the different positions. At the bottom, you see a useful key for the various symbols. I can never seem to remember these, so this can be super useful.
In the bottom right corner, click the right arrow. Now you have two additional preferences you can set:
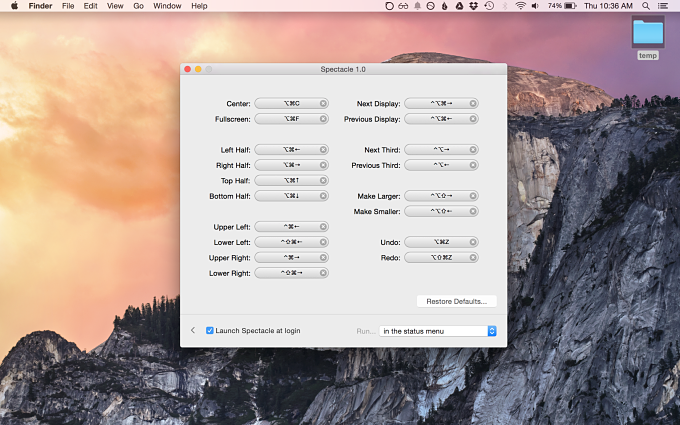
The first, Launch Spectacle at login determines whether or not Spectacle automatically starts when your computer boots up. I keep this checked, since having to open the app when you reboot is an unnecessary step. The other setting allows you to keep the Spectacle app in the status bar (so you always see the little spectacle icon), which is useful if you don’t want to remember the keyboard shortcuts and instead want to use your mouse to select positions. This is what we did above when we sent your browser to the Right Half. I suggest leaving it in the status bar for quick reference of the shortcuts, but you can also make it run only in the background by setting this preference to as a background application.
You’ve learned it… now master it
Even if you leave the spectacle icon in the status bar, it’s time for you to stop being such a noob and using your mouse to change window sizes. That takes, like, a whole 2 seconds. What a waste, you noob!
Learn some shortcuts!
There are a lot of Spectacle keyboard shortcuts that send windows to a bunch of different locations. Don’t be intimidated. Find out which positions you prefer for your windows, and then use, learn and memorize those shortcuts. Then, feel the power! Here’s four shortcuts that I use and love:
option + command + F
The command key is a super important key on Mac OS X, as it’s at the heart of most basic keyboard shortcuts. For reference, you may see the command key abbreviated as cmd or symbolized with ⌘ (which is printed on the key itself, too).
The option key is located next to the command key. For reference, the icon for the option key is generally ⌥.
Pushing option + command + F will enlarge your current window and allow it to fill the maximize size it can. This is the shortcut I use the most, as I’ve started working with all my windows in full screen and using keyboard shortcuts to switch between windows (more on this in a bit).
option + command + left arrow
Pressing option + command + left arrow will make your current window fill exactly the left half of the screen.
option + command + right arrow
This shortcut is suuuper similar to the last one. I think you can figure it out.
control + option + command + right/left arrow
The control key is next to the option key and may be referenced with the icon ⌃. This shortcut will move your window to another screen (if you have another screen hooked up to your laptop). For example, if you have a large external monitor that you use for work, you may want to send a window from that screen to your laptop’s screen. To do that, use this shortcut.
You’ve mastered it… now boss it
No doubt you’ve been wondering this whole time: “Hey dude, the title promises me that I’ll learn how to use my Macbook like a boss. But I don’t feel very boss-like yet. In fact, I kinda feel like this has all been a waste of time.” Ha! this was just warm ups. You’ve now reached the boss level.
Tidy up that Dock
One quirk about window sizes on a Macbook is that the dock takes up space, and does not allow a window to be resized over it. To me, the Dock just takes up valuable real estate. Luckily, there are a couple easy steps you can take to get the most out of your screen. The first of these is to move the Dock from the bottom of your screen to one of the sides.
Take a look at your laptop’s screen right now. What shape is it? If you guessed rectangle, you are correct! Now here’s a real brain teaser… is it wider than it is tall, or taller than it is wide?
Spoiler alert: it’s much wider than it is tall. So, if you have your dock on the bottom, you are decreasing the (already lesser) amount of vertical space you can use for windows. To improve this, head into your System Preferences, and click on Dock. Change the location of the Dock to either left or right, whichever you prefer. Left made more sense to me. While you’re at it, change its size to as small as it gets; screen resolution these days is good enough to see the difference between the icons.
And voilà! we’ve now moved the Dock into a better position and freed up as much screen real estate as possible by making it small. Test it out by Spectacle’ing a window into full screen (option + command + F), and it should be even bigger than before. Magical.
Get rid of the Dock
I know what you’re thinking: “Get rid of the dock? I use that shit!”. Maybe. But you don’t need to. Get ready to really feel the power.
Open up the Dock panel in System Preferences again. Click the check box next to the option Automatically hide and show the Dock. Uh oh, where did it go? Don’t worry, it’s still there. If you hover your mouse over the area where the dock used to be (hopefully the left or right after reading the last section!), then it will appear for you. The nice thing about this set up is that now your application windows can occupy the space once taken by the dock. And if you reallllly need to use the dock, you can make it appear by moving your cursor over to it. But really, you should:
Use Spotlight, not the Dock
Macbooks come with an awesome tool called Spotlight. One of it’s uses is to search your computer for a file. You can also use it to calculate simple math expressions. Another task it can perform is opening applications. So, using the Dock? Sooo 2005.
To open Spotlight, simply press command + space bar. Now you can type in Spotlight, which will search your entire computer. Say we want to open up Terminal, which is a command line application on Mac. Start typing in “terminal”. As you type, Spotlight will display the top hit, along with the rest of the search results.
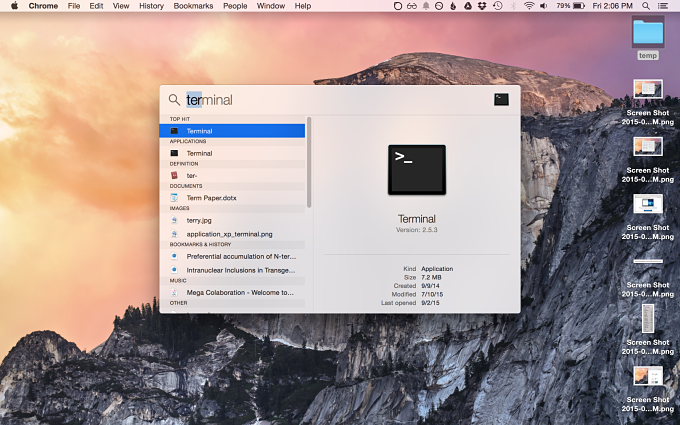
If the top hit is what you wanted, just press Enter to open it. Simple as that! No more moving your hands from the keyboard just to click something in that big, ugly Dock. Ew.
You’ve boss’d it, now…
I can’t think of the next progression after boss. But this is definitely advanced shit. It’s time to use your computer and never take your hands off the keyboard. Here’s how:
Do everything I just told you about
Pretty self-explanatory. If you keep forgetting the Spectacle shortcuts, just keep using them. It’ll get easier. If you work with a large external monitor, you’ll probably enjoy sending your windows to halves or thirds, or even quarters. If you like your Retina display too much and do most of your work with just your laptop’s screen (like me), then you’ll likely want to always work in full screen mode.
What about switching back and forth between windows?
Resist the urge to use your mouse! Macs have a very handy keyboard shortcut for this. Simply hold down command and then press tab once (while keeping command pressed). You will see a list of your currently-open applications. Notice that listed first is the current application you were using. Listed second, and highlighted, is the application that you were using right before the current one. Since it’s highlighted, if you now let go of command, that application will now switch to the front of your screen and your cursor will be located in this window. Repeating this keyboard shortcut (command then tab once and then let go) will select the window you had just left. In this way, you can easily toggle back and forth between your last two open windows by pressing command and hitting tab once.
If you need to head into another window besides one of the two you last used, just keep command pressed and press tab for as many times as it takes to highlight that application. Then let go, and voilà! you just switched windows without your mouse.
But I have, like, a hundred tabs open in my browser
Oh my, what a good point. I guess you will have to use your mouse after all to switch tabs. Psych! Here’s a couple awesome keyboard shortcuts for switching between tabs: shift + command + ] and shift + command + [ for switching one tab to the right, or left, respectively. This is incredibly useful in web browsers.
So, need to open a new tab? command + T. Now switch tabs? shift + command + ]. Been scrolling around on a page, but now need to search something or type in a web address? command + L will allow you to type in the address/search bar. Done browsing? command + W to close the current tab.
These shortcuts also work in a variety of other applications that use tabs, including Finder. Use them, it makes everything faster and way more fun! (Okay, definitely faster, possibly more fun.)
Last one, I swear
I know exactly what you’re thinking: “Kurt, awesome tutorial, but these tools and tricks fall short. I generally have multiple windows open for each application, but the command + tab switcher does not show me each separate window for each application. You were so close, yet so far…”
Well aren’t you special with all your open windows! Try this: open up a couple windows in Your Favorite Application. Instead of command + tab, try command + ` (the key right above tab). This should cycle you through all the currently-open windows in one application. Feel the power!
So what does this all mean?
If you follow these steps, you will be in more control of your work flow. And you’ll look like a boss switching windows and tabs with just your fingers. And that was the whole point of this tutorial, amiright?
Over the past few weeks, I’ve been trying to use the keyboard as much as possible. I guess I want to harness my inner Chloe O’Brian, who can establish a perimeter for Jack Bauer, hack into the FBI and check her Instagram, all from her keyboard. And all the while keeping it real with her classic resting bitch face:
 Photo via http://img15.imageshack.us/img15/3161/chloe2o.jpg
So, if you want to be a Super Computer User, these tools and shortcuts will get you on your way. I’ve enjoyed using my applications in full screen (command + F with Spectacle), command + tab to change between applications, and then shift + command + ] to change tabs. Intuitively, it seems like we could work faster if we could see all of the open windows, but I’ve found that using the shortcuts is faster than taking my hands off the keyboard, so I like using up my entire screen for each application. I just want to use the mouse as little as possible. I guess, like lazy-ass programmers, it’s all about going the extra mile to not have to do something.
Fun fact: this article is all about how to use Mac OS X, even though the word Microsoft window(s) was used 42 times.